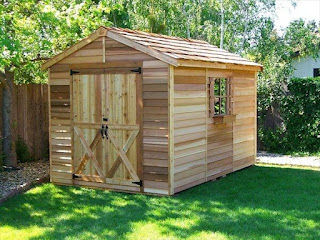
Building Your Dream (and Totally Free!) Pallet Shed
Hey there, fellow DIY enthusiasts! So you're dreaming of a cute little shed for your yard, but the thought of those hefty lumber prices is making your wallet weep? Don't worry, friend! I'm here to tell you about the magic of pallet sheds. Yep, you can build a fantastic, functional shed using reclaimed pallets â€" completely free (or at least, very, very cheap!). It might sound crazy, but trust me, it's totally doable.
Step 1: The Great Pallet Hunt
Before we even think about hammers and nails, we need the stars of the show: the pallets! Now, this is where the adventure begins. The best places to score free pallets are:
- Behind businesses: Grocery stores, hardware stores, and even some restaurants often discard pallets. Just politely ask if they have any they're getting rid of. Be prepared for a "no" sometimes â€" persistence pays off!
- Craigslist and Facebook Marketplace: People often post free pallets or give them away for a small fee. Keep an eye out!
- Construction sites (with permission!): This one requires a bit more finesse. Ask the foreman or site manager nicely if they have any pallets they're discarding. Remember to be respectful of their work and safety regulations.
- Friends and family: Spread the word! You might be surprised how many people have old pallets lying around.
Once you've found your treasure trove of pallets, inspect them carefully. You'll want pallets that are sturdy and relatively undamaged. Avoid pallets with significant rot, pest infestation, or broken slats. Remember, you're building a shed, not a haunted house!
Step 2: Planning Your Pallet Palace
Now that you've got your pallets, let's get down to the nitty-gritty of design. Consider these things:
Size and Shape:
How much space do you need? A small shed for tools? A larger one for storage and maybe even a small workspace? Sketch out a basic plan. You can keep it simple â€" a square or rectangular shed is the easiest to build. Think about the footprint and height you want to achieve. Remember, working with pallets means you’re limited by their dimensions, so plan accordingly.
Foundation:
You'll need a solid foundation. Concrete is ideal but can be pricey. A cheaper and surprisingly effective alternative is using treated lumber for a simple frame. This will level your shed and prevent it from sinking into the ground. You can even just use a layer of gravel for a very simple, temporary foundation.
Door and Windows:
Where will the door go? How about windows for ventilation and light? Plan these out carefully and make sure you have enough pallets to accommodate them. You might need to get creative with cutting and joining pallets to make openings.
Step 3: Construction Time!
This is where the real fun begins! Gather your tools:
- Hammer
- Screws (exterior grade are recommended for durability)
- Drill (with appropriate drill bits)
- Measuring tape
- Level
- Saw (circular saw or hand saw)
- Safety glasses
- Work gloves
Important Note: Before you start disassembling pallets, check for any branding or markings that might indicate the wood has been treated with chemicals. If so, you'll want to wear a mask and take extra precautions. You might also want to consider whether you'll need any extra lumber, depending on your design.
Building the Frame:
Start by building your foundation frame (if you're not using concrete). Once that's done, begin assembling the walls. You can attach pallets directly to each other using screws. Remember to check for levelness frequently. For added stability, you can use additional lumber for bracing in the corners and between pallets.
Roofing:
The roof is probably the trickiest part. You’ll need to carefully plan the angle and how you’ll secure the roofing material. You can use more pallets for a simple shed roof, or you can add a layer of tar paper and then roofing felt for better waterproofing. A simple lean-to roof (one side higher than the other) is often the easiest option for a beginner.
Finishing Touches:
Once the walls and roof are up, it's time for the finishing touches! You can add a door (consider using a pre-made door or repurposing an old one), windows, and paint or stain to protect the wood and personalize your shed. Consider adding a simple latch or lock for security.
Step 4: Finishing and Enjoying Your New Shed!
Congratulations! You've built your very own free pallet shed! Give yourself a pat on the back â€" you've saved a bunch of money and created something truly unique. Now, go enjoy your new storage space! Remember, you can always add features like shelves or hooks later on.
Frequently Asked Questions
- Are all pallets safe to use? No. Inspect them carefully for rot, pests, or chemical treatment markings. Avoid pallets showing signs of damage or decay.
- How long will a pallet shed last? With proper construction and weather protection (paint or stain), a well-built pallet shed can last for several years. Remember that it won't last as long as a shed built from new lumber.
- What kind of screws should I use? Exterior-grade screws are best for outdoor use. They are designed to resist rust and weather damage.
- Do I need permits to build a shed? Check with your local building department. Depending on the size and location of your shed, you might need a permit.
- Can I use pallets treated with chemicals? Yes, but wear protective gear (mask and gloves) and be aware that some chemicals might leach out over time.
- What can I use for roofing? Tar paper and roofing felt provide good waterproofing. You can also use more pallets for a simpler roof, but it won't be as weather resistant.
Happy building, and remember to share your finished pallet shed with us â€" we'd love to see it!


0 comments:
Post a Comment
Note: Only a member of this blog may post a comment.